
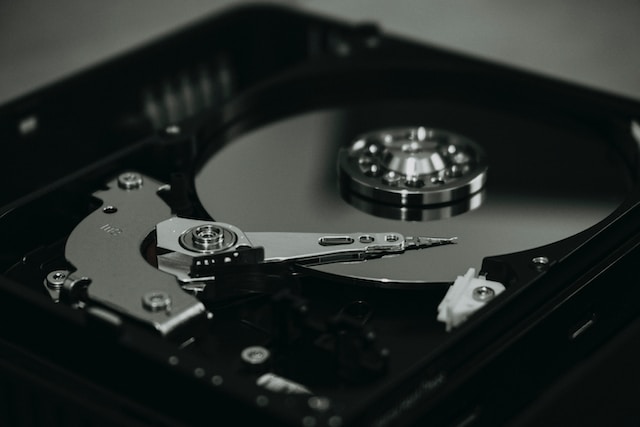
How To Install A New Hard Drive?
Here are the steps on what to do when installing a brand-new hard drive:

- Turn off your computer, then remove your power supply.
- Take off the side panel on the computer case.
- Find the bay for the hard drive, and then remove the screws holding the hard drive.
- Insert the new hard drive inside the bay, then anchor it with screws.
- Attach both the SATA power cable and the SATA data cable to the brand-new hard drive.
- Replace the panel on either side of the computer’s case.
- Install your operating system and then initialize your newly created hard disk.
What Should You Do Following The Installation Of The Brand-New Drive?
We’ll show you the most important steps to take after installing a new hard drive.
Initialize and Format the Hard Drive
After you’ve physically mounted the drive on your laptop, the initial step is to start it as well as format the disk. To accomplish this, you must take these steps:
- Access Management Disk: Click “My Computer” or “This PC” (depending on the Windows version) and then select “Manage.” After that, select “Disk Management” under the “Storage” section.
- Find the New Hard Drive in the Disk Management window: You’ll see an array that includes connected drives. Locate the new hard drive, which is typically identified with the words “Unallocated.”
- Initiate the Hard Drive Start by right-clicking on the drive you want to initialize and choosing “Initialize Disk.” Select the proper partition style (MBR or GPT) and then click “OK.”
- Make a new partition: Right-click on the space you’ve not allocated and choose “New Simple Volume.” Follow the steps to create the new partition and format it using an operating system for files (NTFS is suggested for Windows).
- Create a Drive Letter: After formatting the partition, assign a drive letter to the newly created partition to allow for easy access.
Backup and Transfer Data
When you have your brand new drive installed, it is a great opportunity to protect your data and organize your documents. Take these actions to transfer and backup your information:
- Backup important data: Prior to making any transfer, be sure you backup your important data to a storage device or cloud service. This ensures that your information is protected in the event there are any unexpected issues that arise during the transfer.
- Organize your data for transfer: You can organize your data from your previous hard drives by creating specific folders to store documents, photos, videos, music, and more. This can aid in making the transfer process more efficient and will help you locate files quickly later on.
- Transfer data to a new Hard Drive: There are many ways to transfer information, for example, through the use of external storage devices, cloud services, or data transfer software that is specialized. Pick the one that best meets your requirements and needs.
Update Drivers and Firmware
To get the best functionality and compatibility with your brand-new hard drive, you need to update your computer’s drivers and firmware. Here’s what you must do:
- Update the Hard Drive Drivers Visit the website of the manufacturer for the latest model of hard drive and download the latest drivers when they are available. Install these drivers on your PC to ensure smooth operation.
- Update the Motherboard as well as the storage controller drivers. Go to the website of the manufacturer of your motherboard and download the most current storage controller and chipset drivers. These updates will ensure smooth communication between your new hard drive as well as the other components of the system.
- Update Firmware (If It’s applicable) Certain hard drives might require firmware updates to correct bugs or improve performance. Visit the website of the manufacturer for firmware updates that are specific to your model of hard drive, and follow the directions to install them.
Set Up Automatic Backups
Once your data is securely stored on the new drive, it’s important to create a reliable backup system. This will safeguard your data in the event of a hardware malfunction or any other emergency. Use these guidelines to set up automatic backups:
- Select a Backup Solution: There are a variety of options for backup, such as built-in software like Windows Backup and third-party software such as Acronis True Image or Macrium Reflect. Choose a solution that is compatible with your requirements and budget.
- Setup Backup Settings: Configure the backup software to run periodic backups automatically. Select the files and folders you would like to be included in the backup and choose the latest computer as the location for backups.
- Check the backup: Once you have configured your backup configurations, you can run the backup test and confirm that the backup is properly saved onto the new drive. This will ensure that your backup system is operating properly.
Optimize Hard Drive Performance
To maximize the performance of your new drive, take a look at these performance optimization techniques:
- Make sure TRIM is enabled (For SSDs): If your brand new drive happens to be a solid-state drive (SSD), Make sure that you enable TRIM. TRIM aids in maintaining the drive’s performance as well as its lifespan by effectively managing the storage of data.
- Remove unneeded Services as well as Startup Programs: Examine your list of startup applications and turn off the ones that aren’t needed. This will accelerate your computer’s boot process and also free up your system resources.
- The process of defragmenting (For HDDs): If your new hard drive is a conventional Hard Disk Drive (HDD), you should think about defragmenting the drive. Defragmentation helps organize the information on the disk to speed up access times.
- Update the Operating system and software: Ensure that Your operating system and software are up-to-date for compatibility l with the test hardware and to benefit from the latest enhancements to performance.
Do You Find It Easy To Set Up HDDs?
We will guide you step-by-step through the process of installing an HDD to improve the storage capacity of your computer like an expert.
Gathering the Necessary Tools
Before beginning your installation, you’ll need to get the right tools in place to make sure that you have a smooth and successful upgrade. What you’ll need:
- HDD: Hard Disk Drive (HDD): Of course, the very first thing you’ll need is the brand-new HDD you’d like to install. Be sure that it’s compatible with your PC and suitable for your storage requirements.
- Screwdriver: You’ll need a screwdriver to break open the computer’s casing and anchor the HDD to the computer.
- Data Cables: Go through your motherboard’s specifications to find out what kind of data cable is needed in order to link the HDD directly to the computer.
- Power Cables: Ensure that you have the correct power cables that supply power to the new HDD.
- Anti-Static Wrist Strap to protect the components of your computer from static electricity that could be harmful.
With all the required tools in hand, We can begin the installation procedure.
Step-by-Step Guide to Installing an HDD
Step 1: Prepare Your Workspace
Before you begin installing the software, you need to have a clean and clutter-free workspace. Shut down your computer and remove it from all power sources. Set your computer on a level surface. If you are able, you can use an anti-static mat in order to stop static discharge.
Step 2: Open the Computer Casing
Make use of the correct screwdriver to remove the computer casing with care. Make sure you don’t hurt any of the components within. When the casing is opened, locate an unoccupied drive bay where you’ll mount your new HDD.
Step 3: Connect the Data and Power Cables
Find those SATA ports on your motherboard. Connect your data cable to your HDD, while the opposite end connects to an accessible SATA port. After that, attach the power cord to the HDD.
Step 4: Mount the HDD
Make sure you place the HDD in the drive bay. Then align it correctly. Most drive bays are equipped with brackets or screws to secure the HDD securely in the correct position. Use screws to secure the HDD with a firm grip.
Step 5: Secure the Cables
Make sure your cables are secured and do not block any other components or fans within the computer. Proper management of cables is crucial to ensuring the best performance and airflow inside your computer.
Step 6: Close the Casing and Power On
After double-checking the connections, close the casing of your computer and secure any screws you’ve removed. Then it’s time to turn on your computer.
Step 7: Formatting the HDD
If you’re installing a new HDD without an operating system installed, then you’ll have to format it. This can be accomplished using the disk management program on your computer. Follow the on-screen directions to format your new HDD.
Benefits of Installing an HDD
Once you’ve successfully installed your brand new HDD, Let’s look at the advantages it will bring to your PC and the overall user experience.
- More Storage Capacity: With an upgraded HDD, you’ll have more room to keep your documents, files, pictures, videos, applications, and documents.
- Better Performance: Increased Performance and Low storage, The performance of your computer could be affected. An HDD will help increase the overall performance and speed of your computer.
- Cost-effective Solution: When compared with Solid State Drives (SSD), HDDs offer larger storage capacities but at a less expensive cost, which makes them a cost-effective choice for a lot of users.
- Simple Transfer of Data: With extra storage capacity, you will be able to effortlessly transfer data from other devices or save important documents.
How Do I Connect A Hard Drive To My Laptop?
We’ll walk you through the steps of putting a drive into your laptop. Follow our steps carefully, and you’ll have your new drive installed and up and running in a flash!
Determine Compatibility and Choose the Right Hard Drive
Before you begin the installation, it’s important to make sure that the drive you pick will work with the laptop you’re using. Different laptops support different sizes and types of drives. Therefore, it’s important to conduct some preliminary research. Go through the manual of your laptop or visit the website of the manufacturer for specifics on the supported hard drives.
After you’ve confirmed that your device is compatible, you’ll need to decide whether you want either a classic Hard Disk Drive (HDD) or a Solid-State Drive (SSD). SSDs are more efficient and durable, but they tend to be more expensive than HDDs. Pick the one that’s best suited to your requirements and budget.
Back up your data
Before starting the installation, making backups of your data is essential. There’s always a chance of losing your data due to modifications to your hardware, so make sure you’ve got a backup of your data to ensure that you don’t get into any accidents. You can use the cloud, an external drive, or even create a system image to secure your files.
Gather the Necessary Tools
To complete the installation of the hard drive, You’ll require the following tools:
- Screwdriver: Laptops typically require an incredibly small screwdriver with a Phillips head to take off the back cover.
- The Anti-static Strap Strap (Optional) Although not required, an anti-static wrist strap can help prevent static electricity from damaging delicate components.
Power Down and Disconnect
Prior to opening the laptop, turn it down correctly and disconnect your power supply. Also, take out the battery if it’s accessible. This is essential to protect yourself and prevent any harm to your laptop or newly installed hard disk.
Access the Hard Drive Bay
Find where the drive is located on your laptop. It’s usually located on the bottom and may contain a specific panel or cover that is held by screws. Use the right screwdriver to take off the cover, which will reveal the current hard drive.
Remove the Existing Hard Drive
Disconnect the current hard drive by disconnecting it from the SATA or power cables. Be aware that certain laptops may have different ways of securing the hard drive, including brackets or screws.
Install the New Hard Drive
Insert the new drive in the slot that is empty and connect the SATA cable as well as the power cable. Check that your connections are secure to avoid performance issues. If your laptop is compatible with several hard drives, you are able to connect the new drive alongside the one you have already installed.
Secure the Hard Drive
If your new hard drive requires brackets or screws to keep it in place and secure it, do so. Make sure the drive fits comfortably within the bay to avoid any movement when using laptops.
Replace the Back Panel
After the new drive has been installed securely, reattach the back cover and secure it using screws. Verify that everything is sealed before proceeding to the following step.
Boot Up and Initialize the New Hard Drive
It is now time to boot up your computer after the physical installation has been completed. If you’ve added an SSD, you’ll see faster boot times as well as improved overall performance. If your hard drive is brand new and has not been formatted, you’ll have to start it up and format it with the tools for managing disks.
Restore Your Data
After you have successfully started the new drive, you can start restoring your backup data. Based on the method you used to backup, it is possible to utilize recovery software or an image to retrieve your data and restore your settings.
Update Drivers and Software
When you’re done, ensure that you update your drivers and all software associated with the new drive. Go to the site of the manufacturer for the most current drivers to ensure maximum functionality and compatibility.
Final Checks
Once everything is set up and working, run some final tests. Check that your laptop is recognizing the new drive and that there aren’t any errors or performance issues. Test the drive by copying certain files and using programs to confirm its operation.
FAQ’s
What tools do I need to install a new hard drive?
You will typically need a Phillips screwdriver to remove the case cover of your computer and secure the new hard drive into its bay. Some computers may require additional tools, but a screwdriver is the most common one.
How do I know if the new hard drive is compatible with my computer?
To ensure compatibility, check the specifications of your computer’s motherboard or consult the user manual. Look for the type of hard drive interface supported (e.g., SATA, IDE) and the physical size of the drive (e.g., 2.5-inch or 3.5-inch) to match it with the new hard drive you intend to install.
Do I need to back up data before installing the new hard drive?
Yes, it is crucial to back up your data before installing a new hard drive. Installing a new hard drive usually involves formatting and setting it up as a fresh storage device, which will erase any existing data. Backing up your important files to an external drive or cloud storage ensures you won’t lose any data during the installation process.
Can I install the new hard drive as a secondary drive alongside my existing one?
Yes, you can install the new hard drive as a secondary drive, assuming your computer has available drive bays and connectors. In this setup, the existing operating system on your primary drive will remain unaffected, and you can use the new drive to store additional files and data.
How do I physically install the new hard drive into my computer?
To physically install the new hard drive, follow these general steps:
- Power down your computer and unplug it from the power source.
- Open the computer case following the manufacturer’s instructions.
- Locate an available drive bay (usually near the existing hard drive) and mount the new drive using screws or trays provided.
- Connect the data cable (SATA or IDE) from the motherboard to the new hard drive.
- Connect the power cable from the power supply to the new drive.
- Close the computer case, plug it back in, and power on your computer.
How do I set up the new hard drive after the physical installation?
After physically installing the new hard drive, you’ll need to initialize and format it. Here’s a general guide:
- Boot your computer and enter the BIOS/UEFI settings (usually by pressing a specific key during startup, like F2 or Delete).
- Check if the BIOS detects the new hard drive. If not, ensure it’s properly connected.
- Save any changes made to the BIOS and exit.
- Once your computer boots into the operating system, go to Disk Management (Windows) or Disk Utility (macOS).
- Find the new hard drive listed as unallocated or unformatted.
- Initialize the drive and create a new partition, then format it with the desired file system (e.g., NTFS for Windows or APFS for macOS).
- Once formatted, the new hard drive will be ready for use, and you can start storing data on it.


